Header bidding has changed the game for publishers forever! All of a sudden, they can walk away from outdated waterfall setups and earn the highest bid from each ad impression available. However, it’s not without its challenges. Publishers often struggle setting up header bidding, have ad network issues, receive empty bids, and face slow loading times – all which negatively impact their ad revenue. If you run header bidding, you can probably relate. Sooner or later, you’ll need to learn how to debug your header bidding setup.
The debugging process can get very technical fast. It can also cost you a lot of time and money figuring out issues and hiring developers to assist. With PubGuru Ad Inspector, debugging any header bidding setup is easier than ever before.
PubGuru Ad Inspector or PGAI is MonetizeMore’s free Google Chrome extension that allows you to analyze an ad set up, gain insight into bidders, check logs, and more. Let’s take a closer look at how PGAI helps simplify the header bidding debugging process.
Once you’ve installed the PubGuru Ad Inspector (PGAI) extension, load up your website or the website you want to debug. PGAI helps you check bid response times for ad networks within your header bidding set up. Go to the “Bidder” tab, and you’ll see all the details broken down per ad network. Each will show the bid amounts per ad unit, ad sizes, and the bid response times. This way, you can figure out which bidders are slowing down your site.
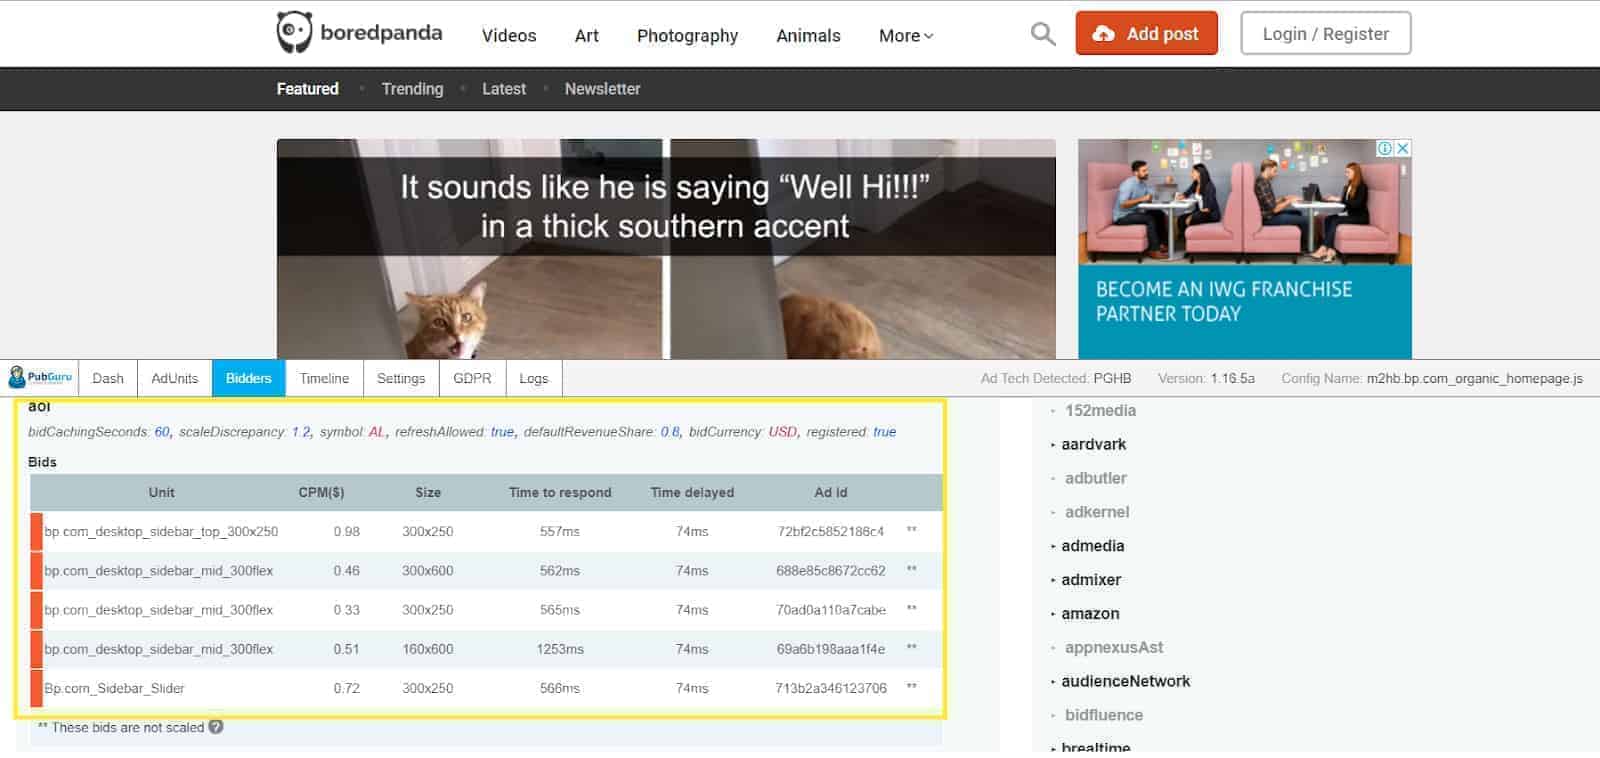
Direct your attention to the top right corner while you’re on the bidder tab. This is where you’ll find the Legend section. This section will show you all the bids that were returned before or after the auction ended. Color codes are assigned to each one. For example, all the bids that did not meet the auction timeout, are highlighted in red.
They could be slowing down your site and causing you to lose ad revenue.

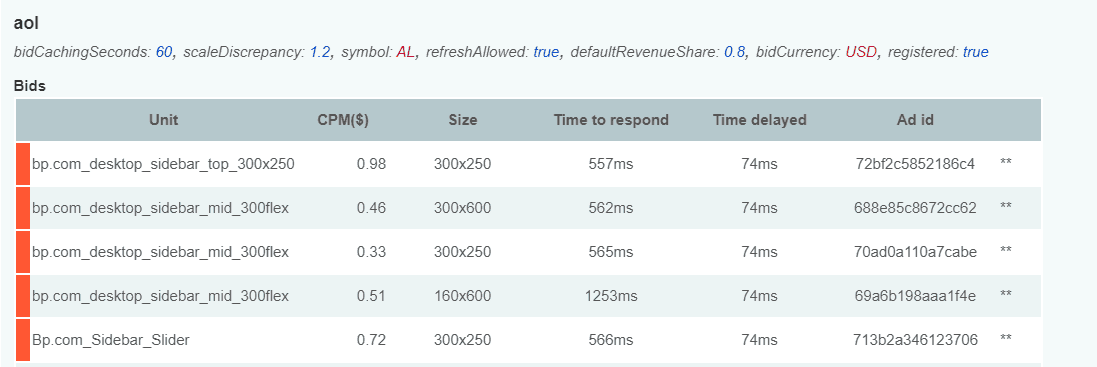
Take a look at the example below with AOL as a bidder. All bids from AOL are highlighted in red, which means they were returned after the auction finished. You should either adjust the auction time to increase competition or remove them to prevent further latency.
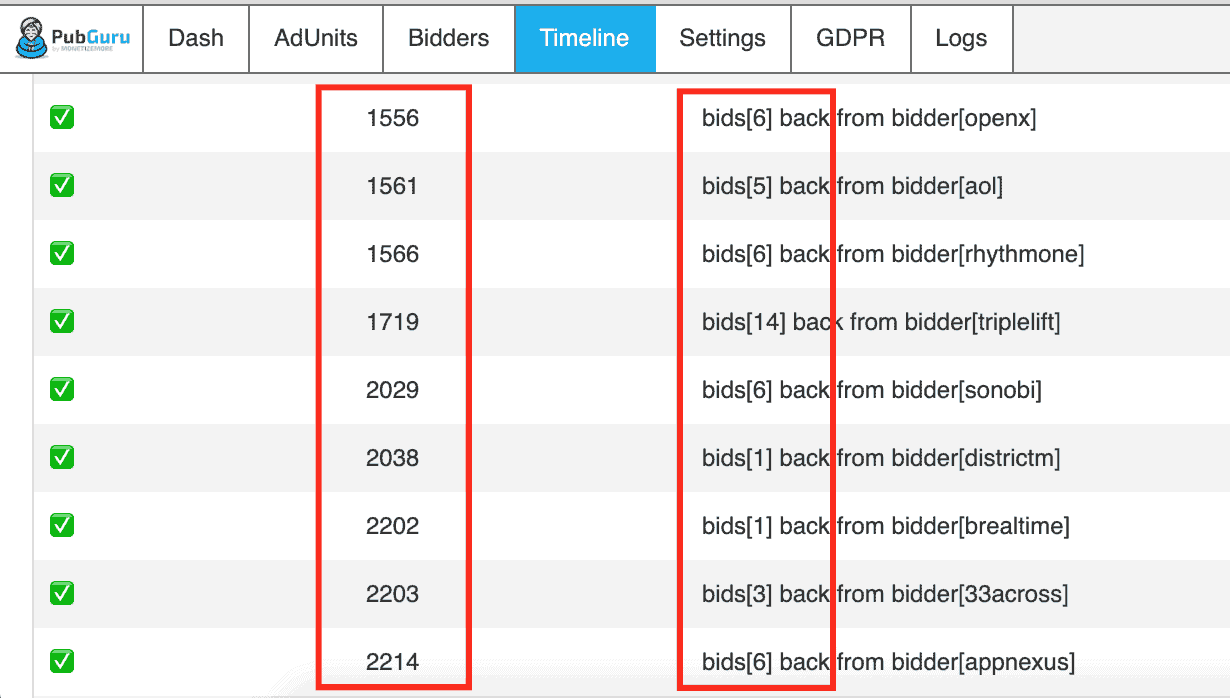
Although you can see the time it took certain bids to respond, the “Timeline” tab gives you an overview of all the bids. As shown in the image below, you can see the amount of time (milliseconds) it took for the header bidding code to be called, and bids returned. Often setting your timeout at 1,000 ms is a good place to start.
You can experiment with different timeouts by adding 500 milliseconds at a time. Try to get at least 5 bidders going as a start and then move from there. Just keep in mind that longer timeouts tend to result in slower page performance.
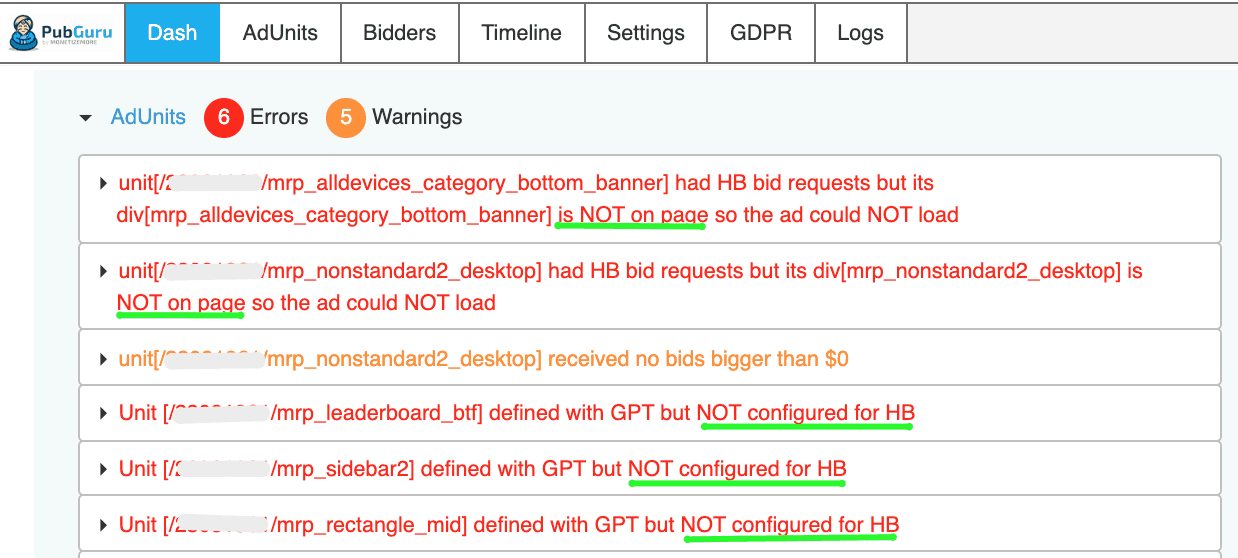
Ideally, every ad unit defined in the <head></head> should have a corresponding div in the <body></body>. This ensures the ad shows up when it’s supposed to. Under the Dash tab, you can see if any inconsistencies exist. For instance, an ad unit div was deployed in the <body> but is not configured for header bidding (i.e., not defined in the <head>), or vice versa.
Take action as needed. If the ad is not supposed to be on that page, remove it from your header bidding configuration and the source code of the site.
If your Google Ad Manager account is non-USD, the conversion is most likely required to match the bids coming in. Check the Logs tab to make sure this is occurring. If not, you’ll need to upgrade your header bidding version.

Audit the ad units configured for header bidding to make sure there are no duplicates. You can find this information under the Logs tab. If your wrapper combines mobile and desktop ad units, especially for responsive ad units (i.e., the ad shows up across all devices), there should be device detection in place. This makes sure that mobile and desktop ad units are tagged and loaded accordingly.

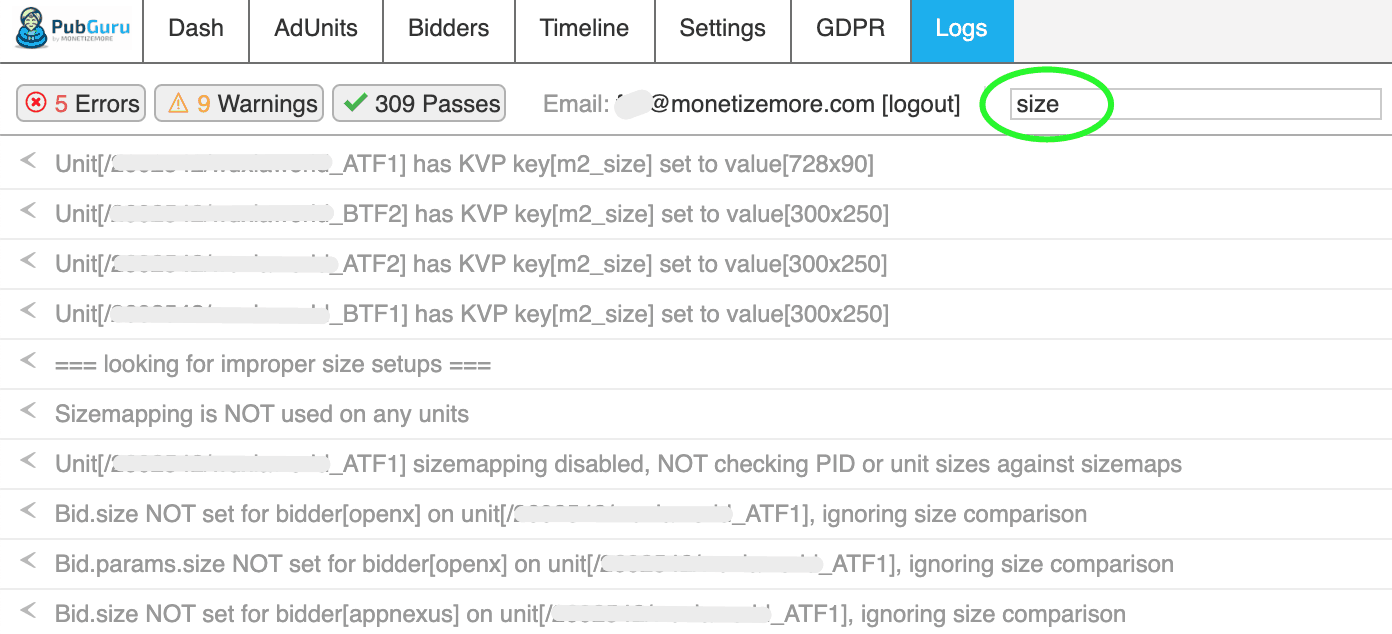
The size bidders are returning in their bid responses should match the inventory size configured for every ad unit, or else, those bids go straight down the drain. If there’s any mismatch, you’ll see this under the Logs tab. You may also use the search or filter box to trim down the results, like in the sample below.
PubGuru Ad Inspector makes debugging header bidding issues and maximizing ad revenue a breeze! Download the PubGuru Ad Inspector Chrome Inspector extension and start optimizing your site today!
10X your ad revenue with our award-winning solutions.